
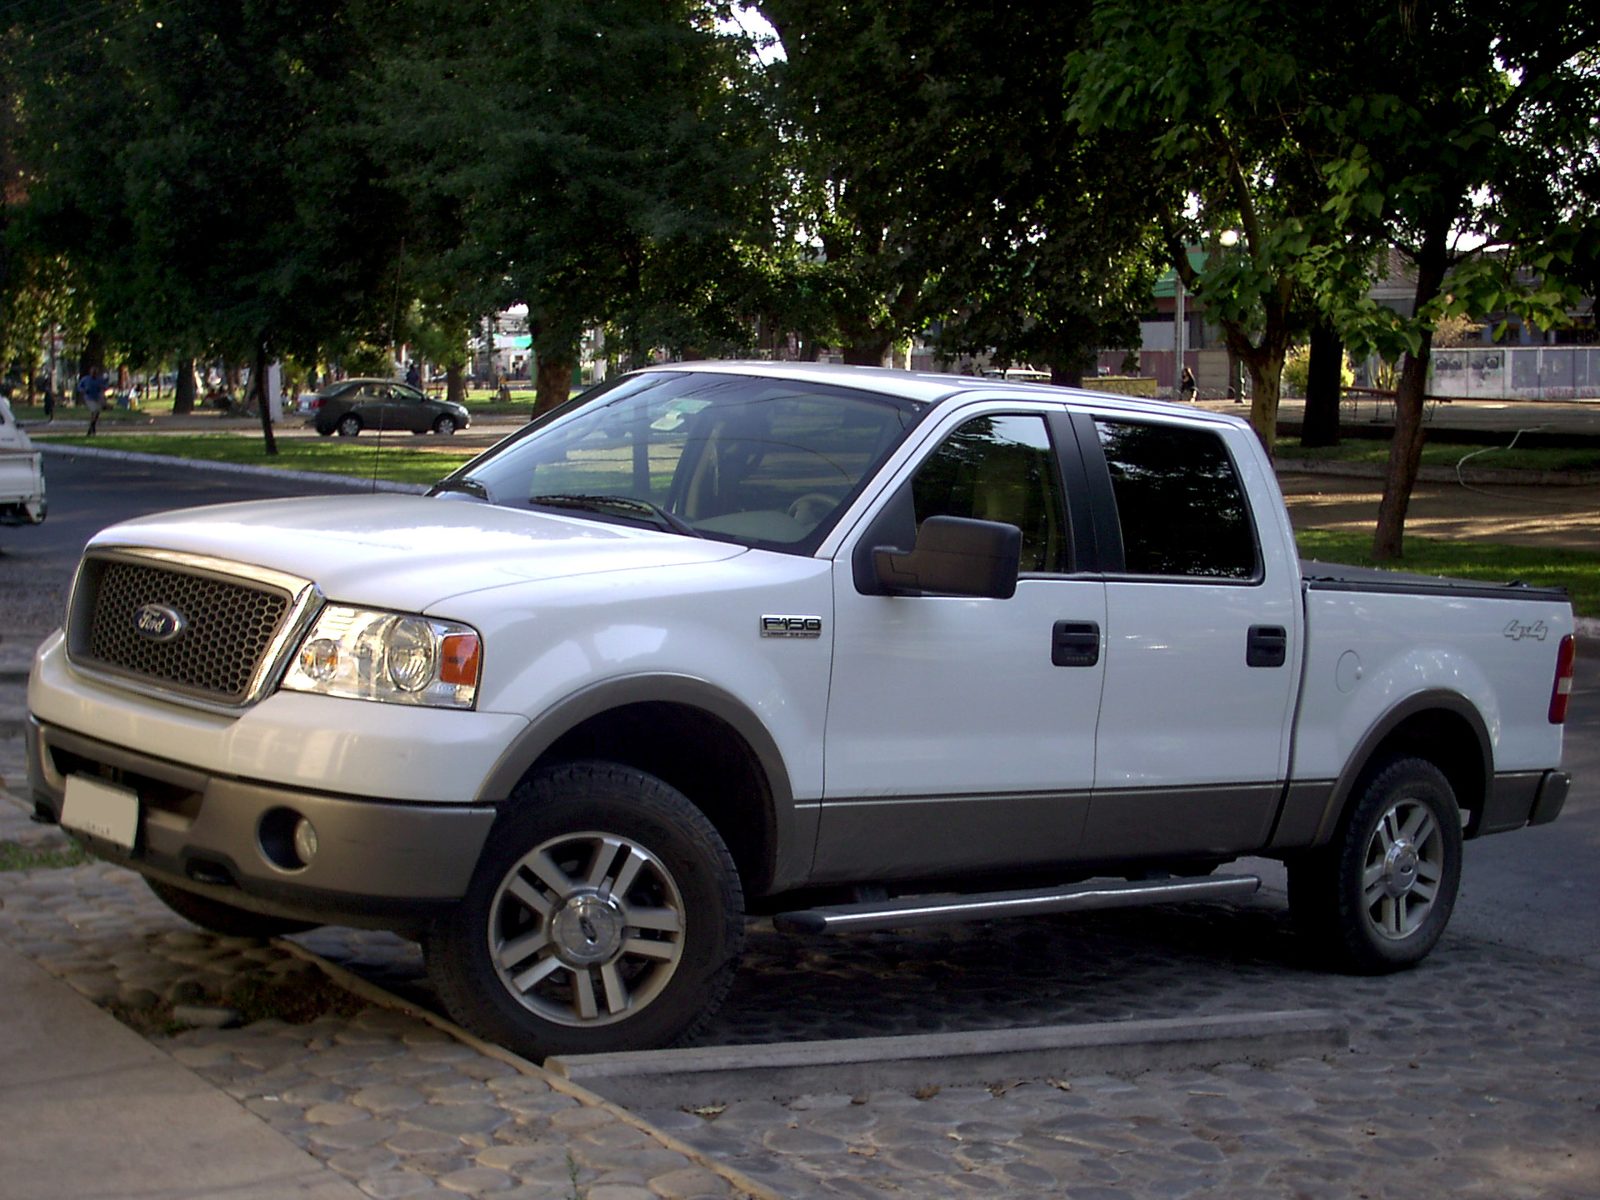
If you own a 2004-2008 F-150 or Expedition with the 5.4L 3-valve Triton, you’ve probably heard the stories. A guy goes to do a simple tune-up, puts a ratchet on a spark plug, and comes back up with half a plug. The other half is still down in the cylinder head, and his Saturday just turned into a week.
The good news: this is a known problem with a known fix. Ford put out a technical service bulletin on exactly how to get these plugs out without snapping them. Follow it to the letter and most of the time the plugs come out whole. Skip steps because you’re in a hurry, and the engine will happily teach you patience.
This guide walks through Ford’s procedure from Ford TSB 08-7-6 (which replaced the earlier TSB 08-1-9), the tools you need, and what to do if a plug breaks anyway.
Why 5.4L 3V spark plugs break
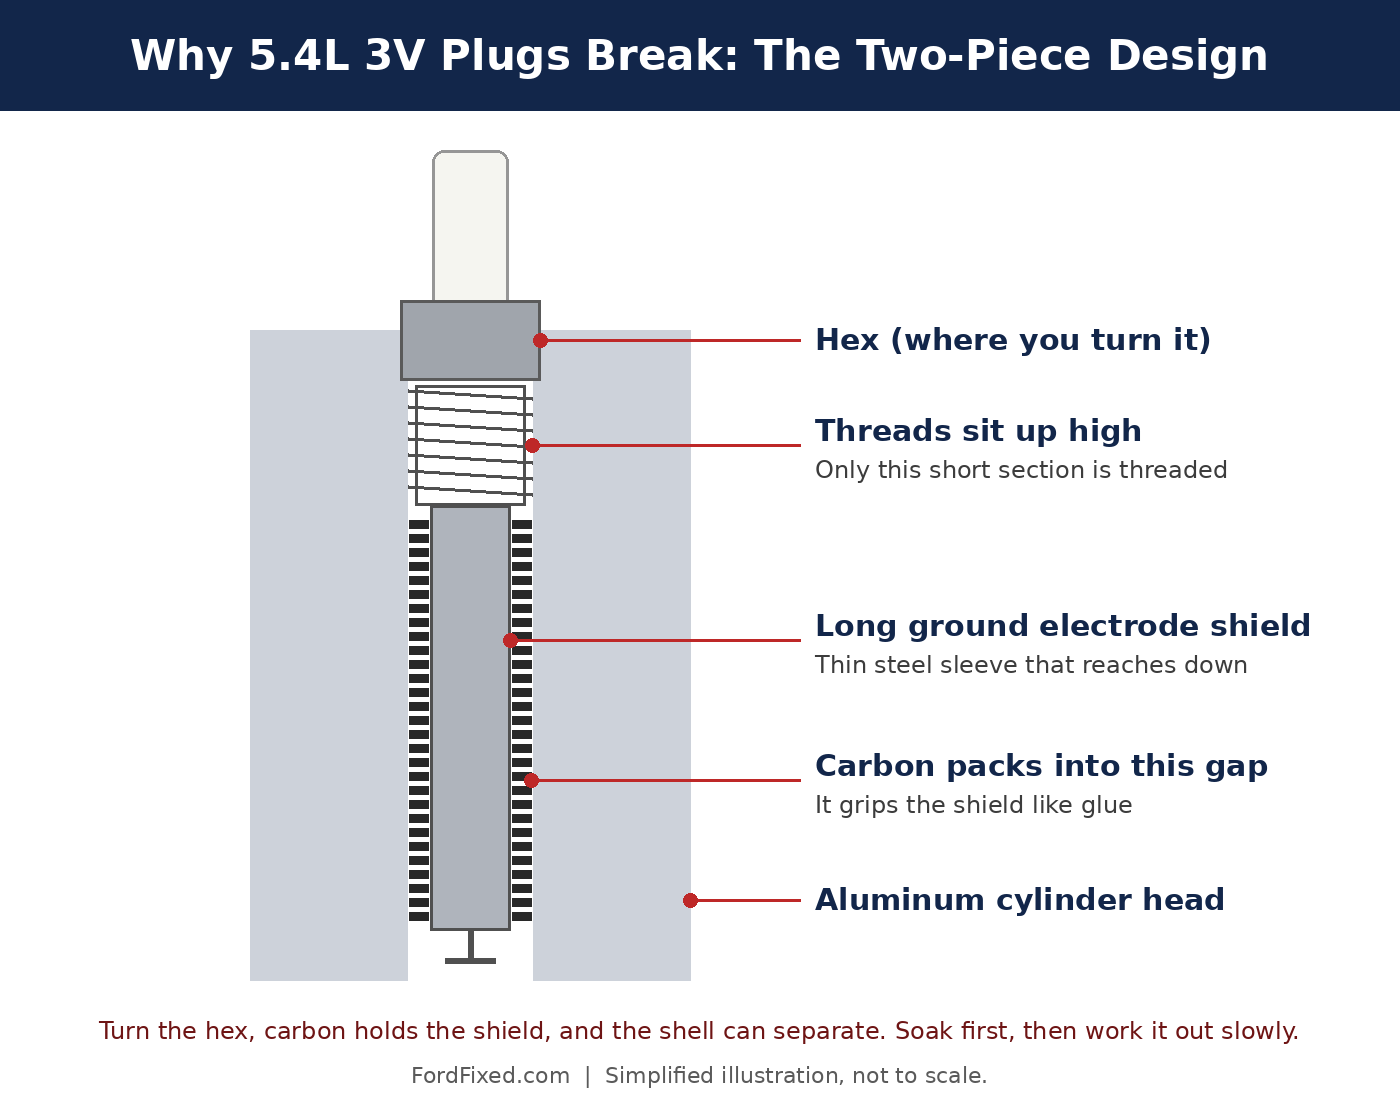
The 3-valve modular engines use an unusual two-piece plug. The threads sit up high, and below them is a long, thin steel shield (Ford calls it the ground electrode shield) that extends down toward the combustion chamber. Over thousands of miles, carbon packs into the gap between that shield and the cylinder head.
When you try to unscrew the plug, the threaded upper part turns but the carbon holds the lower shield in place. Something has to give, and it’s the plug. The shell separates and leaves the shield (sometimes with porcelain still in it) stuck deep in the head. Plugs that have gone well past their service interval are the worst offenders, so if yours are original and the truck has a lot of miles, expect a fight.
Which engines are affected
According to Ford’s bulletin, the issue can affect:
- 5.4L 3V: 2004-2008 F-150, 2006-2008 Lincoln Mark LT, 2005-2008 F-Super Duty, Expedition and Navigator
- 4.6L 3V: 2005-2008 Mustang, 2006-2008 Explorer and Mountaineer, 2007-2008 Explorer Sport Trac
- 6.8L 3V V10: 2005-2008 F-Super Duty and certain stripped chassis
Ford lists the affected engine build dates as before October 9, 2007 for the 5.4L and 6.8L 3V, and before November 30, 2007 for the 4.6L 3V. You’ll find the engine build date on the information sticker on the left-hand (driver’s side) cam cover. If the sticker is gone, assume you’re in the club and do it the careful way. It costs you about 15 extra minutes per plug, which is a lot cheaper than an extractor kit.
Tools and parts you’ll need
Tools
- 3/8-inch drive ratchet, extensions and a 9/16-inch thin-wall spark plug socket OTC 6900 9/16 inch spark plug socket for the 5.4 3V
- Torque wrench that reads in lb-ft, for removal feel and installation TEKTON 3/8 inch drive micrometer torque wrench (10-100 ft-lb)
- Compressed air and a blow gun to clean out the plug wells
- Motorcraft Carburetor Tune-Up Cleaner, which is what Ford’s procedure specifies Motorcraft PM-3 Carburetor Tune-Up Cleaner
- A measuring spoon or small syringe so you can dose cleaner accurately (more on why that matters below)
- Shop light and a magnet pickup tool
- Optional but smart to have on the bench before you start: the Rotunda/OTC 303-1203 broken plug extractor kit, which is a dealer tool (the Cal-Van 39100 Triton spark plug extractor is the usual aftermarket stand-in), or the Lisle 65600 broken plug remover for Ford 3-valve (it uses a different method, so follow its own instructions)
Parts
- 8 new spark plugs. Ford’s current listing for the 5.4 3V is the Motorcraft SP-546, which Ford says replaces the original SP-515. Confirm fitment by VIN or your parts counter before you buy. Motorcraft SP-546 spark plugs (sold individually, you need 8)
- Motorcraft High Temperature Nickel Anti-Seize, called for in the TSB on the new plugs Motorcraft XL-2 nickel anti-seize lubricant
- Coil boots, if yours are cracked, swollen or hard. They’re cheap and you already have the coils out. ENA coil boots with springs (DG511 style) are listed for the 2004-2008 F-150 5.4 and 2005-2008 Expedition. Check the pack count on the listing, since you need 8.
- Dielectric grease for the new boots Permatex 22058 dielectric tune-up grease
Before you start: three rules from Ford
1. Engine at room temperature. Ford’s bulletin says do not remove plugs when the engine is warm or hot. Pulling them from a warm engine raises the chance of damaging the threads. Let it sit overnight.
2. Hand tools only. No air ratchets, no impacts, no cordless anything. Ford is blunt about it: spark plugs must only be removed with hand tools. You need to feel what the plug is doing.
3. Don’t overdo the cleaner. Too much carb cleaner, or repeating the soak several times with too much fluid, can put enough liquid in the cylinder to hydro-lock the engine. Measure it. This is not a “glug glug” situation.
A side note: you’ll find older advice online (including in some trade articles) that says to get the engine hot first, or to soak plugs overnight in penetrating oil. We’re sticking with what Ford wrote in the bulletin, which is cold engine and carb cleaner.
Step-by-step: removing 5.4L 3V spark plugs the Ford way
Work one cylinder at a time. Label your coil connectors if you’re worried about mixing them up, though they only reach their own coils.
- Pull the coils and clean the wells. Remove the coil-on-plug assemblies. Then thoroughly blow out the spark plug wells and the area around the valve covers with compressed air. Anything sitting in that well is going into your cylinder when the plug comes out, so be fussy here.
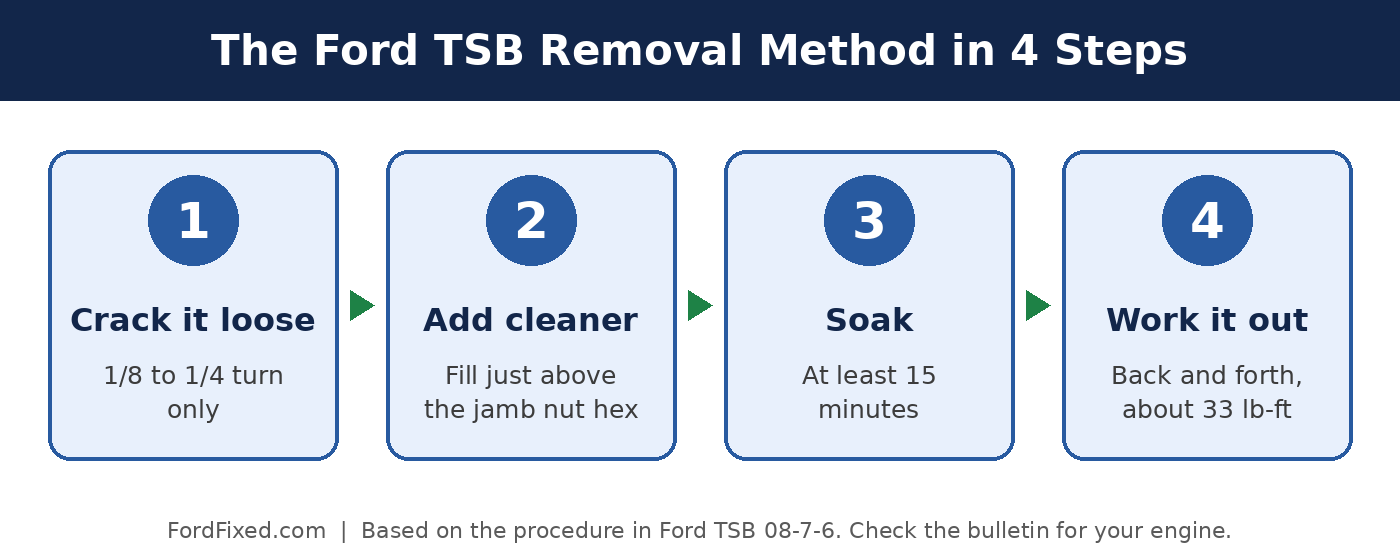
- Crack the plug loose, barely. Back the spark plug out no more than 1/8 to 1/4 of a turn. That’s it. You’re just opening a path for the cleaner to reach the carbon.
- Add the cleaner. Shake the Motorcraft Carburetor Tune-Up Cleaner well and use it at room temperature (Ford says to read the product label). Fill the plug well just above where the jamb nut hex sits, which Ford puts at about 1/2 to 3/4 teaspoon.
- Let it soak at least 15 minutes. Ford’s minimum soak time is 15 minutes. During that time the cleaner wicks down to the ground electrode shield and softens the carbon. Do not work the plug back and forth while it soaks. Go do the next cylinder, or get a coffee.
- Work it out slowly. Tighten the plug, then loosen it, working it back and forth. Ford warns you may hear some screeching and feel high effort. That’s normal, as unpleasant as it sounds. The bulletin gives an expected removal torque of about 33 lb-ft (45 N-m). Keep rocking it back and forth until the turning effort drops, then remove the plug.
- Inspect what came out. A whole plug with its long lower shield intact means you won. If the plug came out short, or the lower shield is missing, stop and go to the broken plug section below.
If a plug is fighting you hard, slow down. Patience is the whole trick with these engines. Rushing turns a $10 plug into a $300 problem.
Installing the new plugs
- Per the TSB, apply a thin film of Motorcraft High Temperature Nickel Anti-Seize to the ground electrode shield of each new plug. Do not coat the electrode strap.
- Thread each plug in by hand first. Cross-threading an aluminum head is a special kind of bad day.
- Torque to spec. Ford’s parts listing for the SP-546 gives 22 to 28 lb-ft (30 to 38 N-m) with a dedicated 9/16-inch spark plug socket. Check your shop manual or plug packaging for your exact engine.
- Put a little dielectric grease inside the coil boots, then reinstall the coils and connectors.
When a plug breaks anyway: the three failure modes
Even when you follow every step, a plug can still separate. Don’t panic and definitely don’t start poking around with a screwdriver. Ford’s bulletin sorts broken plugs into three types, and the fix depends on which one you have:
- Mode 1: The ground electrode shield is left in the head as an empty shell.
- Mode 2: The whole porcelain insulator and the ground electrode shield stay in the head.
- Mode 3: The upper porcelain broke off, and the rest of the porcelain is still stuck inside the shield.
Mode 1: empty shield left behind
This is the job the Rotunda 303-1203 extractor is built for. Ford’s note is important: the tool is only designed for an empty shield. If there’s porcelain inside, you’re in Mode 2 or 3.
In short, the TSB procedure is:
- Cut a vacuum cap to a 3/8-inch (10 mm) length and use the installation rod from the 303-1203 update kit to push it into the shield, down to the electrode strap. This plugs the hole so debris doesn’t fall into the combustion chamber.
- Coat the end of a 9.0 x 1.0 mm plug tap with general-purpose grease and turn it about 3 to 4 turns into the shield. Back the tap out often to break chips. Do not try to pull the shield out with the tap. Ford warns the tap may break, and then you’d have two problems.
- Seat the stepped end of the tool’s pilot bushing in the plug well, screw the center shank into the shield (don’t over-tighten it), add the nylon washer and jack nut finger tight, then turn the jack nut until the shield pulls free.
Mode 2: porcelain and shield left behind
Ford’s procedure adds another 1/2 teaspoon of Motorcraft carb cleaner to the well and gives it another 15-minute soak. Then you carefully pull the porcelain out with long-nose pliers using an up-and-down motion, trying not to crack it. Once the shield is empty, finish with the Mode 1 procedure.
Mode 3: porcelain broken inside the shield
This is the nasty one. Ford calls for a separate tool kit (Rotunda 303-1398), which bonds a pin into the broken porcelain with an adhesive, and that adhesive has its own temperature and cure requirements. Ford also warns not to drive the porcelain down with a punch, because fragments can fall into the combustion chamber.
Honest advice: if you’re looking at a Mode 3 break and you don’t have the kit or a lot of experience, this is a good time to call a shop that has done these before. There’s no shame in it. The guys who have the kit have usually bought it the hard way.
When to stop and get help
- The plug feels like it’s turning freely but not backing out (it may be separating).
- You see porcelain inside a broken shield (Mode 2 or 3).
- The threads in the head feel damaged, or a plug ever blew out of the head.
- You’ve done the soak more than once and you’re tempted to add “just a little more” cleaner. Remember the hydro-lock warning.
Thread damage in the head is a separate repair. Ford has issued service information on thread repair for these engines, and a qualified shop can usually fix it without pulling the head.
How to make next time easier
- Don’t stretch plug changes way past the recommended interval. Long intervals give carbon more time to weld that shield in place.
- Use the anti-seize on the ground electrode shield exactly as the TSB describes.
- Keep this page bookmarked. Future you will be grateful, and future you is usually the one doing the work.
Sources
- Ford TSB 08-7-6: Spark Plug Removal Instructions, 4.6L 3V / 5.4L 3V / 6.8L 3V (April 1, 2008; supersedes TSB 08-1-9)
- TechShop: Damage Control, Spark Plug Removal Techniques on Ford Modular Engines
- Vehicle Service Pros: Tool Briefing, Triton Engine Triple Threat
- Ford.com: Motorcraft SP-546 spark plug listing (torque and replacement info)
- Ford Truck Enthusiasts forum: 5.4 3V owner discussion
This guide is for informational purposes. Always confirm procedures and specs for your specific vehicle with a factory service manual or your Ford dealer. As an Amazon Associate, Ford Fixed earns from qualifying purchases.